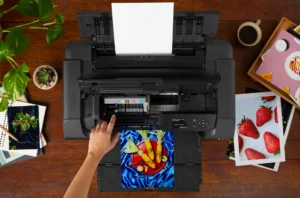
Soft-proofing is a technique that simulates on-screen how your photograph looks in print but without actually making a print. It can save you invaluable time and inkjet media, so sounds an ideal solution – but how does it work and is soft-proofing worth the effort?
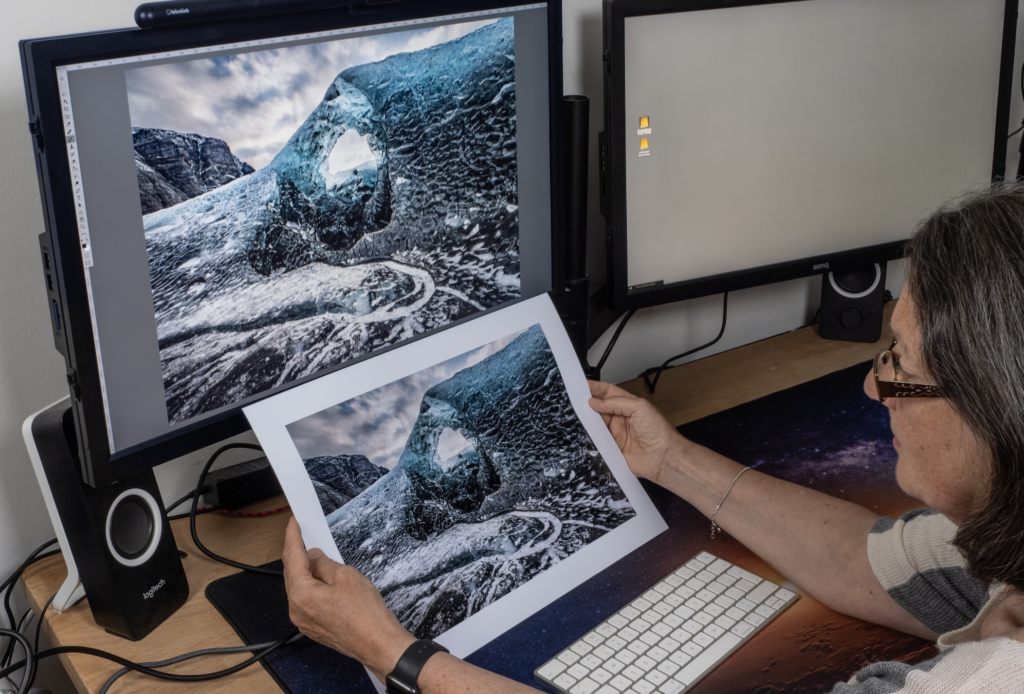
There’s nothing like seeing your beautifully composed and lovingly processed photographs in print. Achieving high quality results is straightforward, whether you make prints at home or use a printing lab. Which route you take is up to you but I feel there’s nothing like printing at home, and being able to make A3+ and even A2 prints within minutes of turning on the computer is a total joy.
Of course, there are challenges to getting perfect prints time after time, and inevitably if you’re setting up a capture to print workflow there will be a few fine-tuning issues until you arrive at a smooth process. That said, speaking as an averagely computer-literate person, I found that the simple expedient of following instructions worked for me, especially with all the incredible technology at our disposal.
Soft-proofing is one example. Popular editing software, including Adobe Photoshop, Lightroom Classic and DxO Photolab, have soft-proofing skills that let you simulate on your monitor how a digital file will look before it’s printed on your chosen media. Scroll down for step-by-step details for soft-proofing in Photoshop and Lightroom.
Essentially, soft-proofing has the potential to replace hard-proofing and avoids the risk of wasting time and media on producing prints that look different from what you see on-screen. To make use of soft-processing effectively you need to make sure your imaging workflow is up to scratch. Having a colour managed workflow is not a dark art, you just have to be organised and invest in some kit, and be consistent in how you check your prints.
Things to consider before soft-proofing
Choosing a monitor
Ideally, buy a high quality monitor designed for photography. Go for a 4K IPS panel with controls to adjust contrast and brightness that can show 100% of the Adobe RGB colour space. Skimping on this vital piece of kit is a false economy; it doesn’t make sense to spend thousands on a high megapixel camera and use first-rate lenses and then edit the results on a small screen that’s more at home for word processing. So, if you have the budget and space, a 27in or even better a 32in display will show off your handiwork very nicely indeed.
Positioning the monitor and its environment needs some thought too. There are the ergonomic considerations because you don’t want to end up with backache after an editing session, but you also want the monitor to show off your work at its best. Avoid direct lighting falling onto it and reflections, and use the monitor shading hood if one is supplied to keep glare down.
Then you need a monitor calibration device. Datacolor has recently introduced its latest product, the Spyder X2 which comes in Elite and Ultra variants, the latter for high brightness screens, priced at £249 and £299 respectively. The other brand in the colour management market is Calibrite and it too has recently updated its offerings with the Display Plus HL, Display Pro HL and Display SL, priced at £299, £229 and £157 respectively.
ICC profiles
When you’re printing through software there is usually the option of asking the printer to manage colour output, but that is no guarantee of success and best avoided; you need to take control.
The first option is to use a generic ICC profile. Usually provided free of charge, the paper manufacturer will have profiles for a range of printers for download from its website. PermaJet has generic ICC profiles for a wide variety of printers available in Mac and Windows. Generic profiles can give fine results and many photographers may not go any further, but taking an extra step will deliver superior, more accurate results.
Everyone has different circumstances, so a custom ICC profile produced from a print actually made by your system is the ideal. Buyers of PermaJet paper can get a custom ICC profile free of charge. Just download the assets here, make a test print on your chosen media and post this off to PermaJet. Within 48 hours you’ll get a custom profile by email with instructions on how to use it.
Now you are ready to soft-proof following the process below for Photoshop and Lightroom.
Setting up soft-proofing in Photoshop (I used v 24.6)
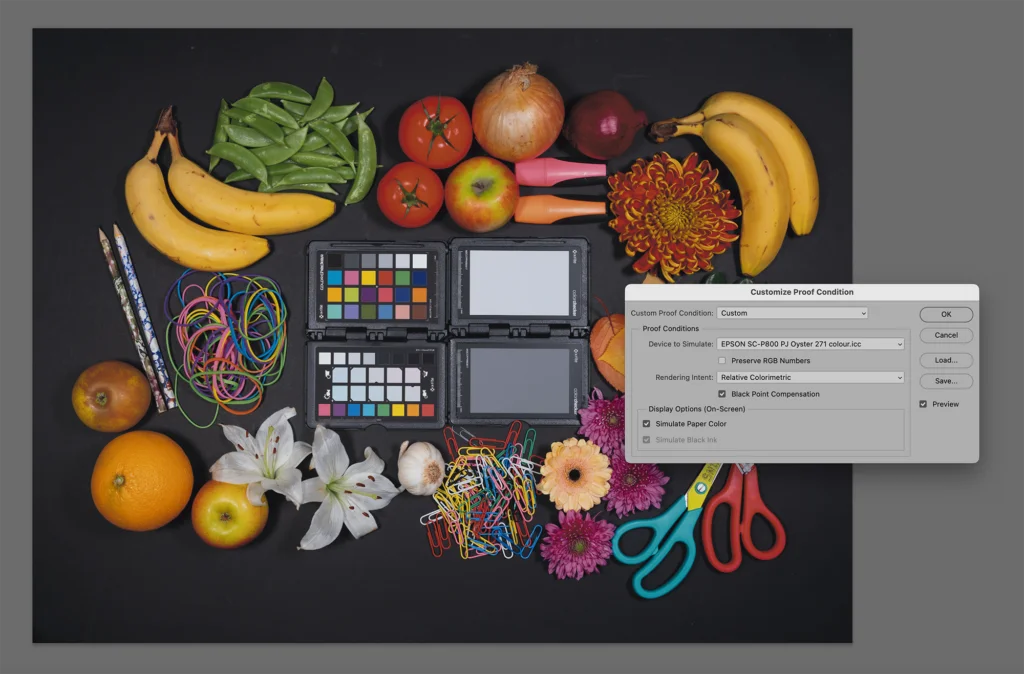
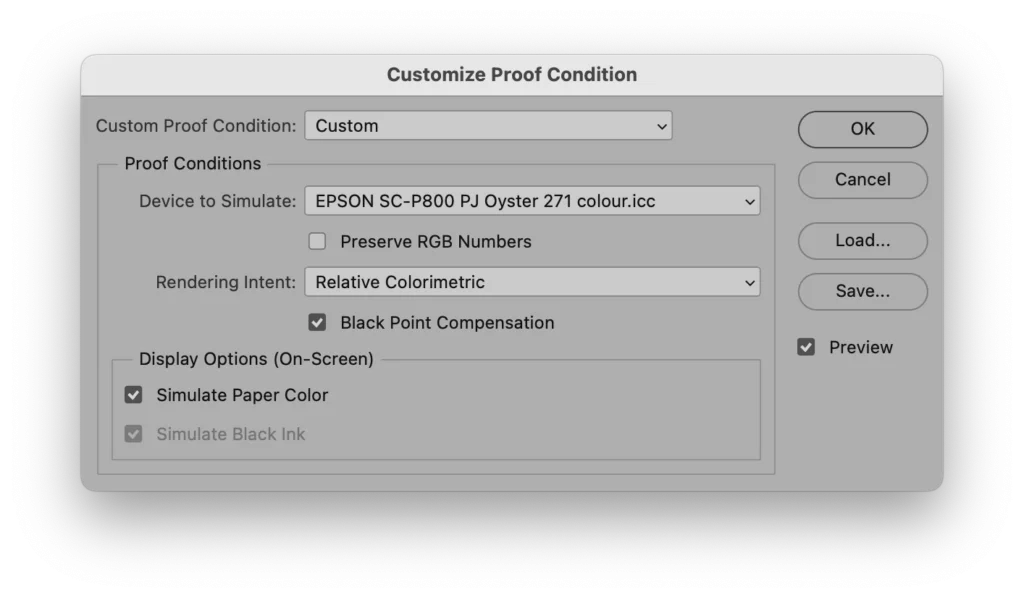
- With the edited image open in Photoshop, go to Menu > View > Proof setup > Custom.
- In the interface that appears, on the drop-down Device to Simulate menu, select the ICC profile relevant to the paper you’re using.
- Choose Relative Colorimetric, tick Black Point Compensation and Simulate Paper Color, before clicking OK.
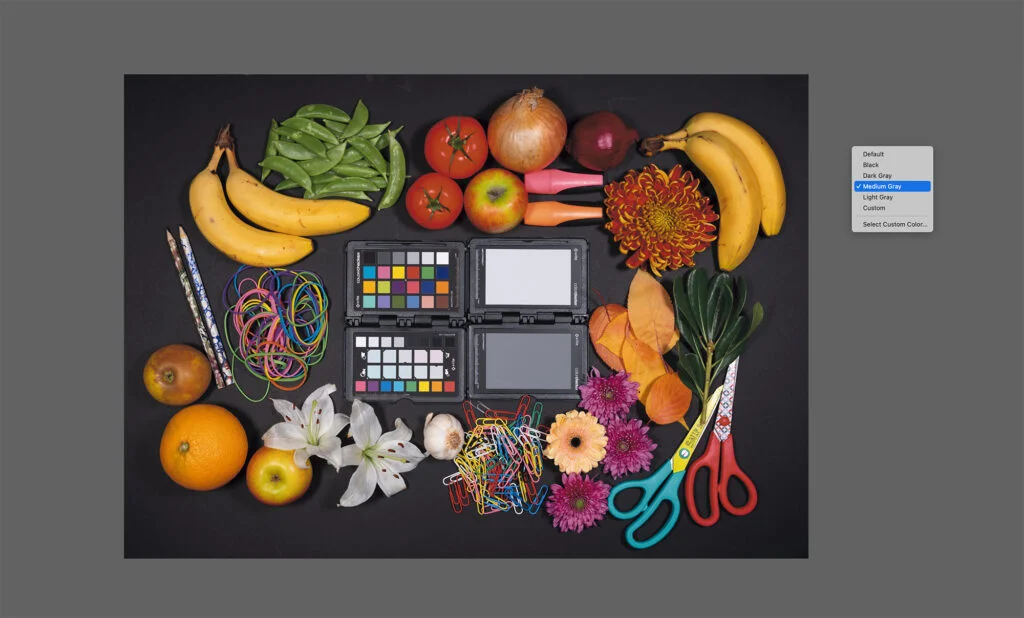
- View the image in full screen mode by hitting the F key. I prefer using a dark grey background to view the image (the default is a light grey), while some photographers prefer white to simulate the paper border. There’s no right or wrong, just what you prefer. Right-clicking on the background provides the colour options which includes a custom setting.
- Toggle between soft-proofing on or off by using CTRL/CMD + Y and use Shift + CTRL/CMD + Y to show the out of gamut colours for the intended paper and printer.
Setting up soft-proofing in Lightroom Classic
Adobe Lightroom Classic is an excellent workflow software and in recent updates its editing and masking skills has seen substantial improvements. It allows soft-proofing too.
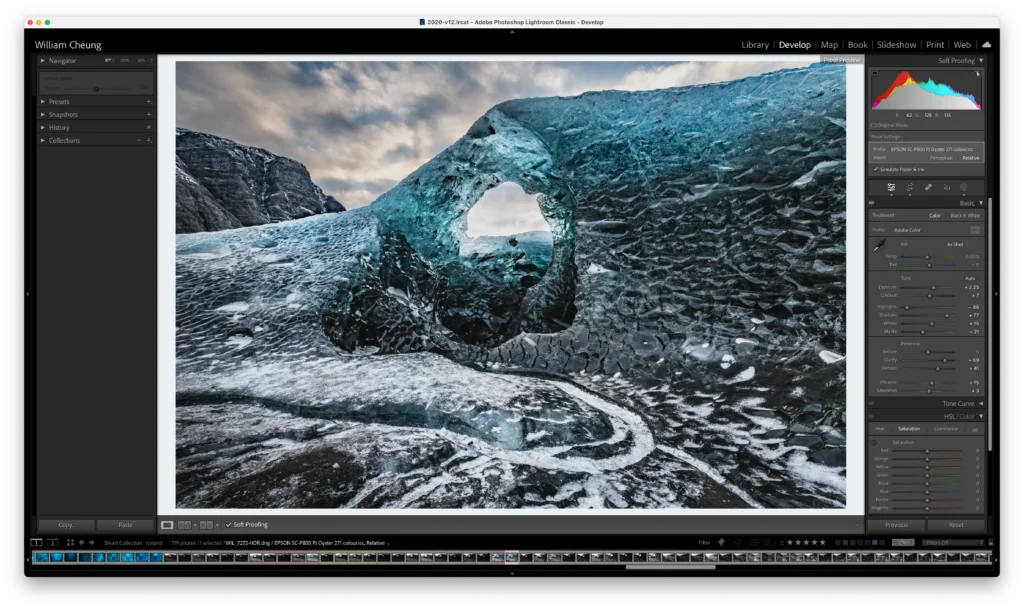
- Go to the Develop Module and below the displayed image, tick on the Soft Proofing box.
- Top right of the interface are the soft-proof settings.
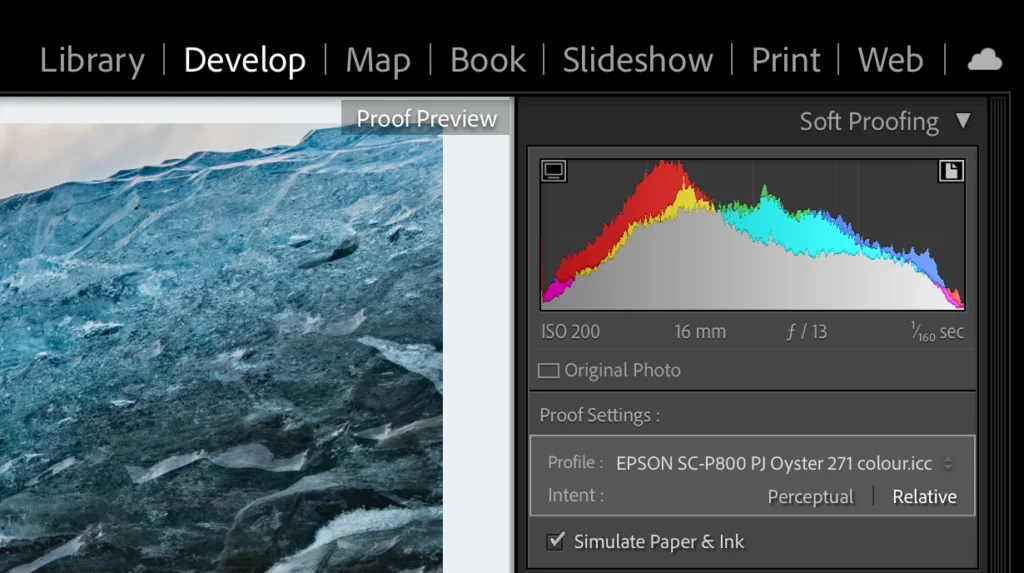
- Under Profile select the relevant ICC profile and select Relative.
- In the histogram, you can activate gamut warnings for the chosen profile and the monitor. In the image, blue indicates colours beyond the monitor’s range and red shows colours outside the printer’s rendering capabilities.
- Finally, tick Simulate Paper & Ink
The drawbacks of soft-proofing
With a mouse click or two you’ll be viewing your photograph as a simulated print on-screen. You can check that the print will have shadow and highlight detail and be within the colour gamut of the paper you’re using. If the soft-proof doesn’t look ‘correct’, its colour, saturation and brightness can be tweaked before hitting the print button or exporting the image. However, you do have to be a little wary when you’re adjusting the soft-proof. For example, if you are adjusting an image according to out of gamut warnings, it is possible to go too far which impacts on the final result.
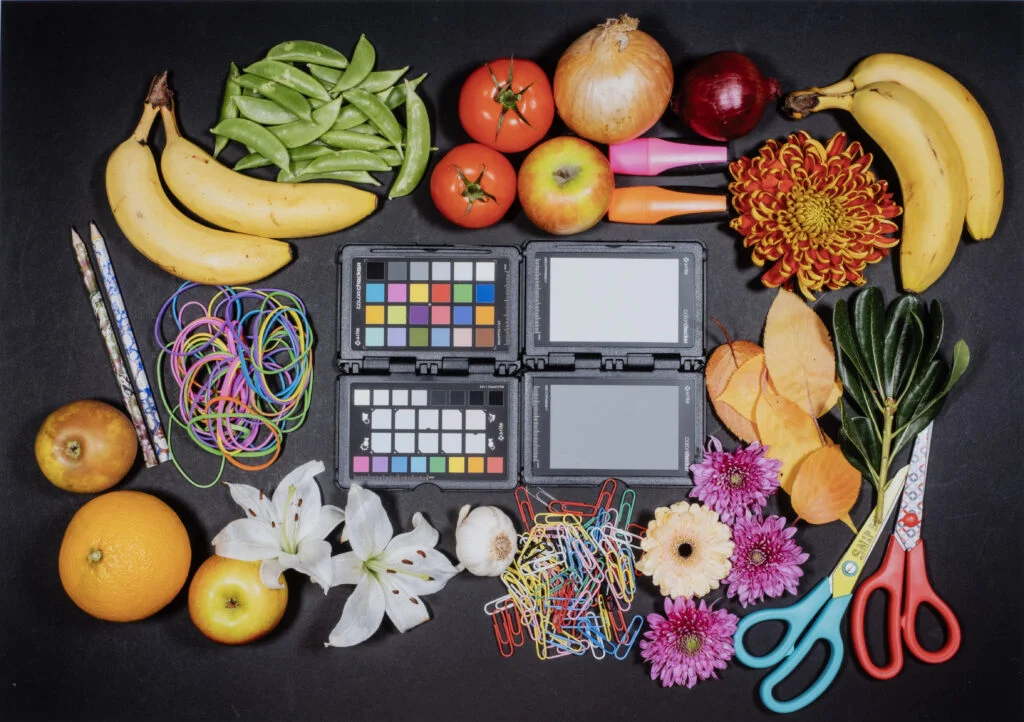
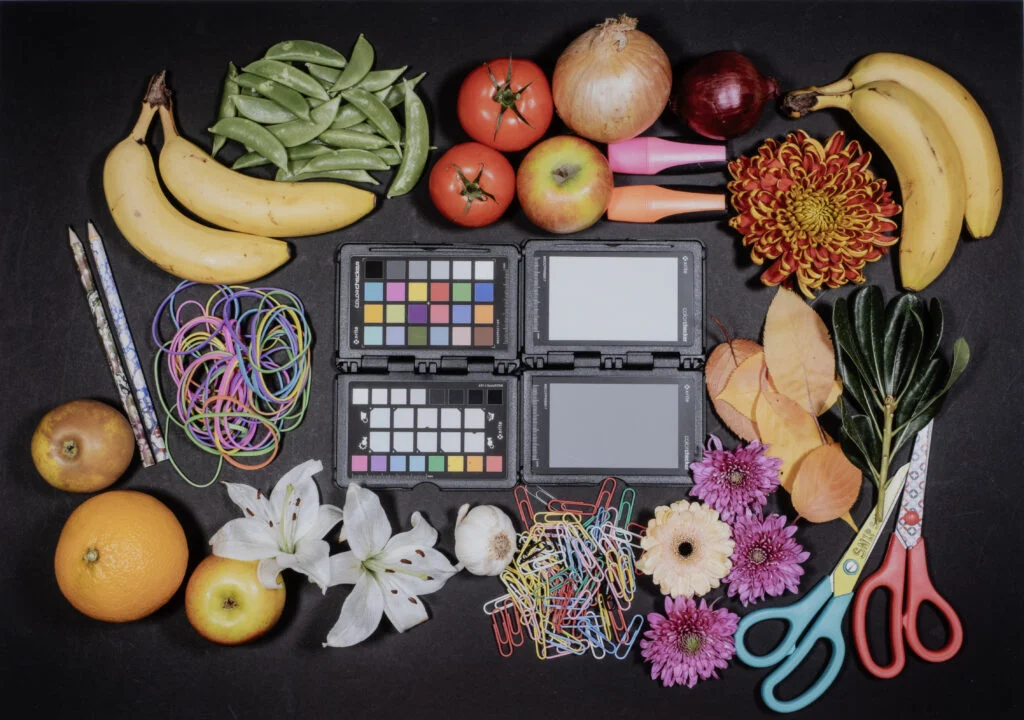
In the test image below, you can see the original printed ‘as is’ and then the image corrected according to the out of gamut warnings. Both prints were outputted onto PermaJet Oyster 271 paper. The original print looks excellent despite the out of gamut warnings, while the corrected image has less impact and saturation is not so vivid. To be fair, each print viewed in isolation looks perfectly acceptable, although I prefer the original.
How to get the best out of hard-proofing
All that said, soft-proofing is a very useful facility and does save ink and paper so is worth using. However, it doesn’t get round the matter of how an image looks on different paper surfaces, and that you’re viewing an image via transmitted light whereas prints are viewed by reflected light. Ticking the ‘Simulate Ink and Paper’ box and using the correct ICC profile help, but no monitor can accurately simulate a real paper finish.
Ultimately, the very best way of assessing how the image will look on your chosen media is to actually make a print. Of course, this uses ink and paper, but you don’t have to commit to a full-size print.

On a blank document drag, drop and resize your images before printing it out on the same material as your intended final print. If your usual workflow is to make A3 prints, cutting up a sheet provides four A5-size sheets, a perfect size for hard-proofing. The other more convenient approach is to work in batches of pictures at a time. Just drag and drop each image onto a blank A3 document and then resize each one using the ‘Transform’ mode while holding down the Shift key to maintain image proportions. With a mix of images, such as a combination of rectangular format, square and panoramic images, make a montage maximising print space; this is the quickest method and minimises waste.
Make the print on the same paper that you intend for the final prints, using the paper’s profile and check the results in daylight. Of course, the colour of daylight is always changing, often imperceptibly. However, PermaJet has a solution for this too, with the LED Desktop Daylight Viewing Lamp, great value at £60.95. If the test print is too dark or too light or has a faint colour cast, make corrections and produce another small proof print if you feel the need for extra reassurance.
To sum up, soft-proofing is easy thanks to the latest software, and is convenient and has the potential to save time and money, although you do need a colour-managed workflow. But the best guide remains a hard proof. Just print out a smaller version, assess it carefully and then only make the full-size print when you are happy.


